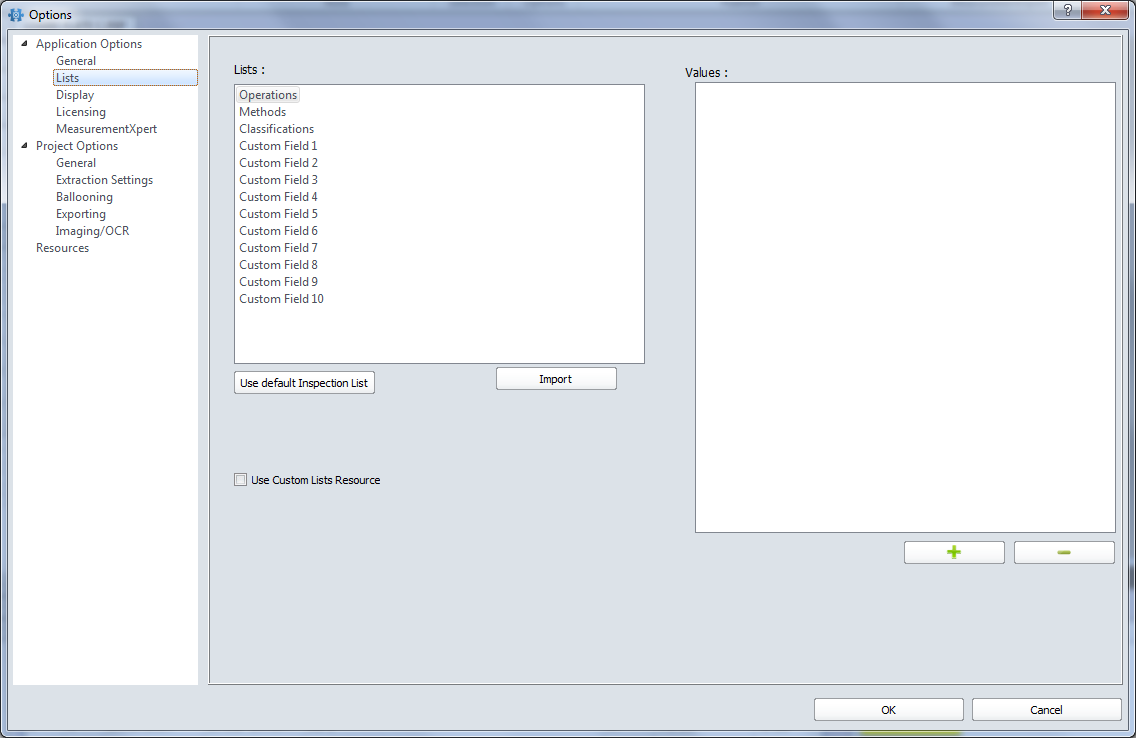
Many of the lists in OnDemand 2.0 can be customized to fit your company's requirements. Values in these lists can be added, deleted, or modified, and you can even import a .csv file into these lists. The following lists can be edited in OnDemand 2.0:
•Methods
•Operation
•Classification
•Custom Fields
NOTE: The custom field lists label can be renamed to be more descriptive. Custom Lists are now supported for both CAD and PDF

Import a CSV File
1.Click Home>Options, which displays the Options window.
2.Under the Application Options tab and then click the Lists tab, which displays the lists and values.
3.Click the list to which you wish the values imported.
NOTE: The custom field lists label can be renamed to be more descriptive.
4.Click Import, which displays the Open dialog box.
5.Search for, find, and select your .csv file and then click Open, which adds the imported file to the Lists tab.
6.Click OK to close the Options window.
NOTE: You can select the list into which you want the values imported.
Add Values to Lists
1.Click Home>Options, which displays the Options window.
2.Click the Application Options tab and then click the Lists tab, which displays the lists and values.
3.Click Operations or Methods or Classification or Custom Field # under Lists, which displays all the current values.
4.Click ![]() which adds a new row to the bottom of the values list.
which adds a new row to the bottom of the values list.
5.Click in the row and then type a new value.
6.Repeat this process until all the values have been entered.
7.Click OK to close the Options window.
Edit Values in Lists
1.Click Home>Options, which displays the Options window.
2.Click the Application Options tab and then click the Lists tab, which displays the lists and values.
3.Click the list you want to edit, which displays all the current values.
4.Click on the row you wish to edit and then type a new value.
5.Click OK to close the Options window.
Delete Values in Lists
1.Click Home>Options, which displays the Options window.
2.Click the Application Options tab and then click the Lists tab, which displays the lists and values.
3.Click the list you wish to edit, which displays all the current values.
4.Click on the row you wish to delete and then click ![]() .
.
5.Click OK to close the Options window.
Centralizing Custom List Access
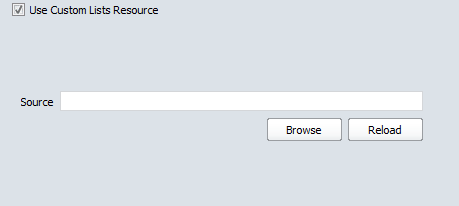
If you want to dynamically update your list by linking it to a list source such as a database you can do so using the custom lists source. If you select this option, the Lists on this tab will not be used, instead, only the linked list will be used. When "Use Custom Lists Source" is checked, you can specify the path to an .xml file that has been customized, or you can specify the path to a database. NOTE: If the Source field is empty, InspectionXpert will load data from the data source named "InspectionLists.xml".
1.Click Home>Options, which displays the Options window.
2.Click the Application Options tab and then click the Lists tab, which displays the lists and values.
3.Click the list you wish to edit, which displays all the current values.
4.Click Use Custom Lists Source checkbox
5.Enter the File source in the Source field, or click Browse to search for the location of the file source.
6.Enter the User name and Password, if this is required to access the list.
7.Click Reload which loads the values from your custom lists source.
8.Click OK to close the Options window.
