Set Default Measurement Units
You can set up default measurement units for various dimension types. These measurement units will be automatically applied to your current project as you capture inspection characteristics. You can override the default unit by choosing a different unit in the units drop-down menu in the Property Manager.
To setup the units that display in the Property Manager:
1.Click Home on the menu bar and then click Options, which displays the Options dialog box.
2.Click the Project Options tab and then click the General tab.
•For Length, Angular or Radial dimensions choose your desired measurement unit from the drop-down menu. These default measurement units will be applied to your inspection project.
•You can also set custom sub-types and units from the corresponding drop-down menus for Custom Sub Type Units.
•In the Default Geometric Tolerance Units section, choose the default measurement unit for each Geometric tolerance type. These default units will be applied to the Geometric Tolerances in your inspection project.
•NOTE: If unit of measure can not be found for a given annotation, the Units should be populated based on these settings. These settings should not override any unit of measure that we can identify from CAD files.
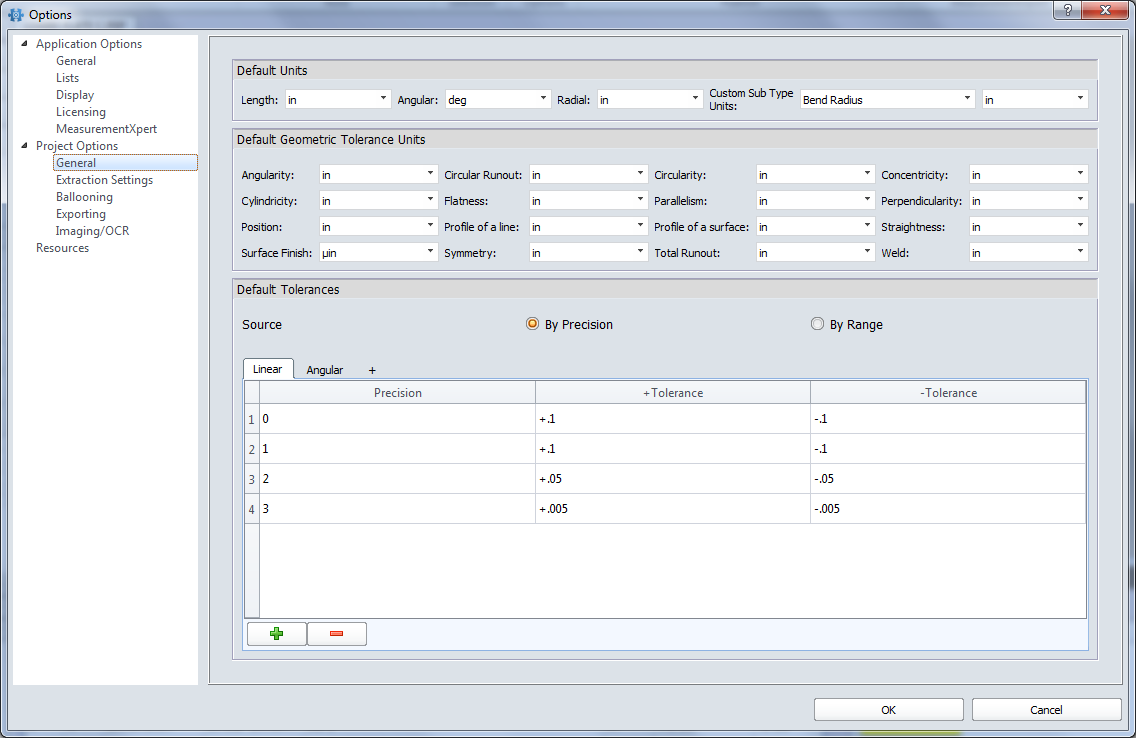
To have InspectionXpert automatically add a default tolerance when an explicit tolerance is not specified on your inspection file, you will need to set up default tolerances in your InspectionXpert Options.
NOTE: If you select By Range, enter your values, and then click By Precision, your default tolerances will be set by precision and not by range. Please make sure to double-check your type selection.
TIP: Any Default Tolerances row can be deleted by clicking on the row (indicated by number) and then click ![]() .
.
Set By Precision
To set the tolerance by precision for length:
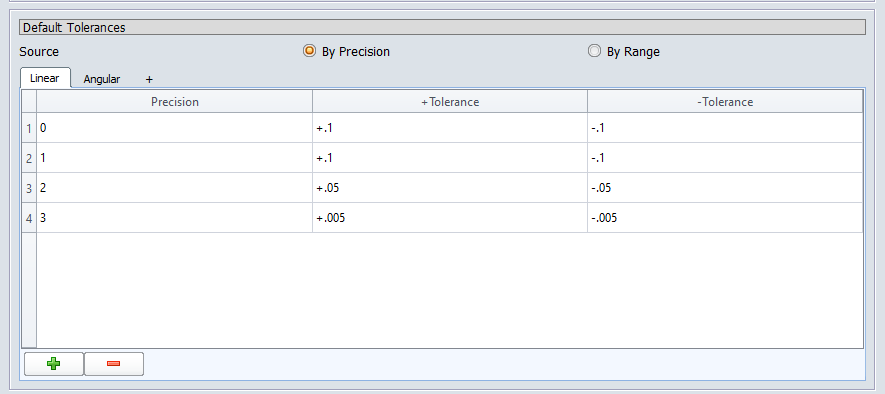
1.Click By Precision to enter your default tolerances by precision (i.e. based on the number of decimal places in your nominal dimension). Default tolerances can be setup for Length or Angular dimensions.
2.To set default tolerances by Precision for Length dimensions, click the Linear tab.
3.Click ![]() , which adds a row with 0's for precision, + Tolerance, and - Tolerance
, which adds a row with 0's for precision, + Tolerance, and - Tolerance
4.Click in the text box under a column and then type the tolerances for a dimension with zero decimal places on the line “0” in the table.
5.Continue to click ![]() and then types values in rows.
and then types values in rows.
To set the tolerance by precision for angular:
.png)
1.Click By Precision to enter your default tolerances by precision (i.e. based on the number of decimal places in your nominal dimension). Default tolerances can be setup for Length or Angular dimensions.
2.To set default tolerances by Precision for Angular dimensions, click the Angular tab.
3.Click ![]() , which adds a row with 0's for precision, + Tolerance, and - Tolerance.
, which adds a row with 0's for precision, + Tolerance, and - Tolerance.
4.Click in the text box under a column and then type the tolerances for a dimension with zero decimal places on the line “0” in the table.
5.Continue to click ![]() and then types values in rows.
and then types values in rows.
To add new tolerance tabs:
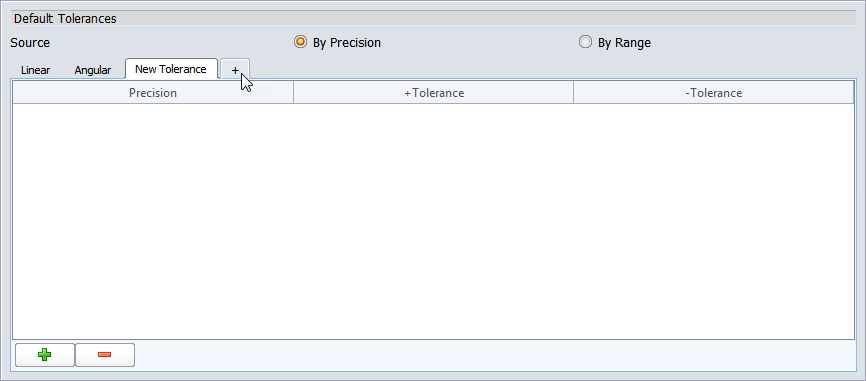
1.Click the ![]() to add a new tolerance tab.
to add a new tolerance tab.
2.Double click the tab to rename it.
To change the Tolerance Type in the Properties / Preferences tab:
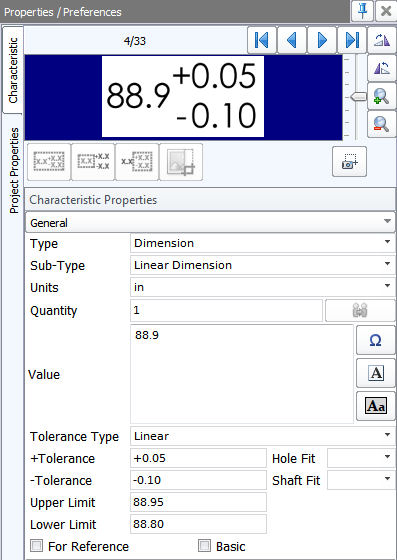
1.Tolerance Type dropdown menu allows for switching between Tolerance Types.
2.The text fields below the Tolerance Type menu are used to change settings for only the selected measurement, not affecting the default types
Set By Range
To set the tolerance by range for length:
.png)
1.Click By Range to enter your default tolerances by a range of values. Default tolerances can be setup for Length or Angular dimensions.
2.To set default tolerances by Range for Length dimensions, click the Length tab.
3.Click ![]() , which adds a row with 0's for Lower Limit, + Tolerance, and - Tolerance.
, which adds a row with 0's for Lower Limit, + Tolerance, and - Tolerance.
4.Click in the text box under a column and then type the tolerances for a dimension with zero decimal places on the line “0” in the table.
5.Continue to click ![]() and then types values in rows.
and then types values in rows.
To set the tolerance by range for angular:
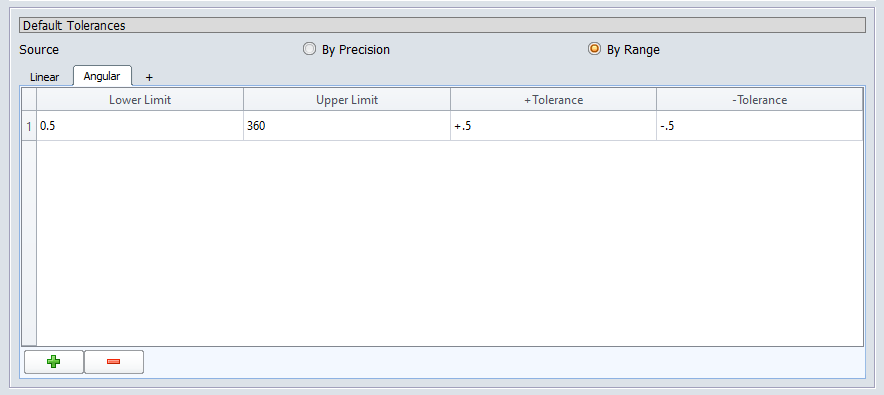
1.Click By Range to enter your default tolerances by a range of values. Default tolerances can be setup for Length or Angular dimensions.
2.To set default tolerances by Precision for Angular dimensions, click the Angular tab.
3.Click ![]() , which adds a row with 0's for lower limit, upper limit, + Tolerance, and - Tolerance.
, which adds a row with 0's for lower limit, upper limit, + Tolerance, and - Tolerance.
4.Click in the text box under a column and then type the tolerances for a dimension with zero decimal places on the line “0” in the table.
5.Continue to click ![]() and then types values in rows.
and then types values in rows.
6.You may now set multiple default tolerances for PDF as well as CAD