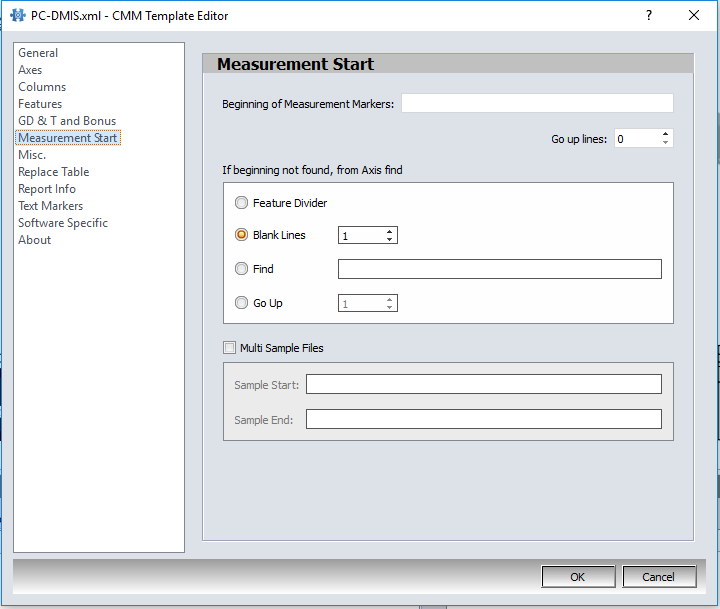
Measurement Start settings informs CMMXpert where to locate the beginning of measurement results in the CMM output file.
1.Click the ![]() settings button in the CMMXpert window, which opens the CMM Grid Settings dialog box.
settings button in the CMMXpert window, which opens the CMM Grid Settings dialog box.
2.Click the template you wish to modify in the Template Control section and then click the ![]() edit button.
edit button.
3.Click General in the list, which displays the Templates - General section.
4.Click the Template Type down-arrow and then click the CMM output from the list.
5.Click Measurement Start to open the Templates - Measurement Start section.
6.Click in the Beginning of Measurement Marker text box and enter the available field if one is notable in the CMM output file.
7.Click the up and/or down-arrow on the Go Up Lines counter to adjust the beginning marker position.
8.Additional criteria are available if the beginning of measurement is not found. Select from the following options:
•Find Feature Divider
•Find Blank Line
•Find (user defined)
•Go Up (user defined) number of lines.
TIP: The best practice is to use a BLANK LINE to separate any job and part information from the first characteristic measurement in the CMM program. These lines help ensure the job and part information do not get included as information pertaining to just the first characteristic. A common problem is the sample ID changes between samples, and as such, CMMXpert will interpret the first characteristic as unique for each sample, which results in the sample results having their own line and not put together as one.
