InspectionXpert saves your inspection characteristic data so you can make changes, export to multiple inspection reports, and save your ballooned file into additional formats.
To start a new inspection project and setup the general settings:
1.Click New Project from the  menu
menu
2.Choose your inspection project template from the Project Templates window. To create/ edit custom project templates go to the Project Templates section.

1.From the Open window, choose the PDF, TIFF, or CAD file you wish to use for your inspection project.
2.Complete the Project Properties section.
3.Click ![]() .
.
Using the Name/Value section of the properties section, you can add custom values. Once these custom values are added, you can access them again in the template editor to map to an inspection report or they can also be saved with a project template for later use. They are also saved with your project for reference.
To complete the Project Properties section:
1.Click the ![]() lightning bolt icon to use the extraction tools to extract text from the currently active file or model for use in the project.
lightning bolt icon to use the extraction tools to extract text from the currently active file or model for use in the project.
![]()
2.Continue to enter or select values for the Part and Drawing.
3.To add custom Project Properties, click in the Name text box and choose a property name from the drop down menu in the Name field, then enter the value in the Value field.
Tip: If you do not see the field you want in the drop down list, you can simply type a new customer property name in the Name field and enter a value in the in the Value text box. Any custom project properties you add here can be used with the InspectionXpert Template Editor to populate your inspection reports.
4.Click the OK button.
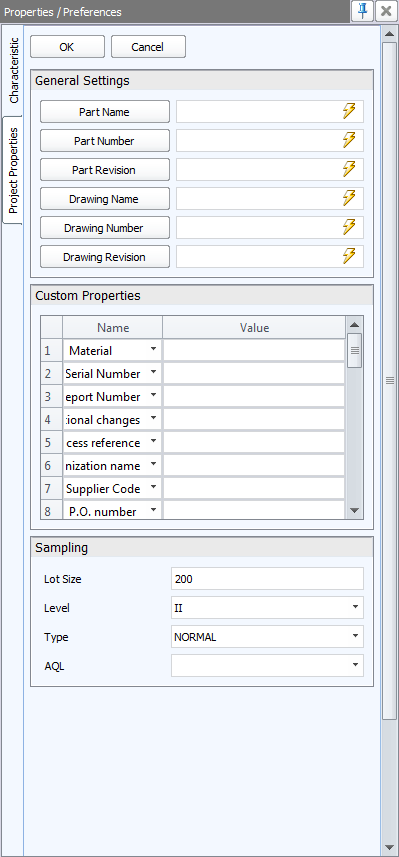
The sampling and AQL sections are now available in CAD and PDF files