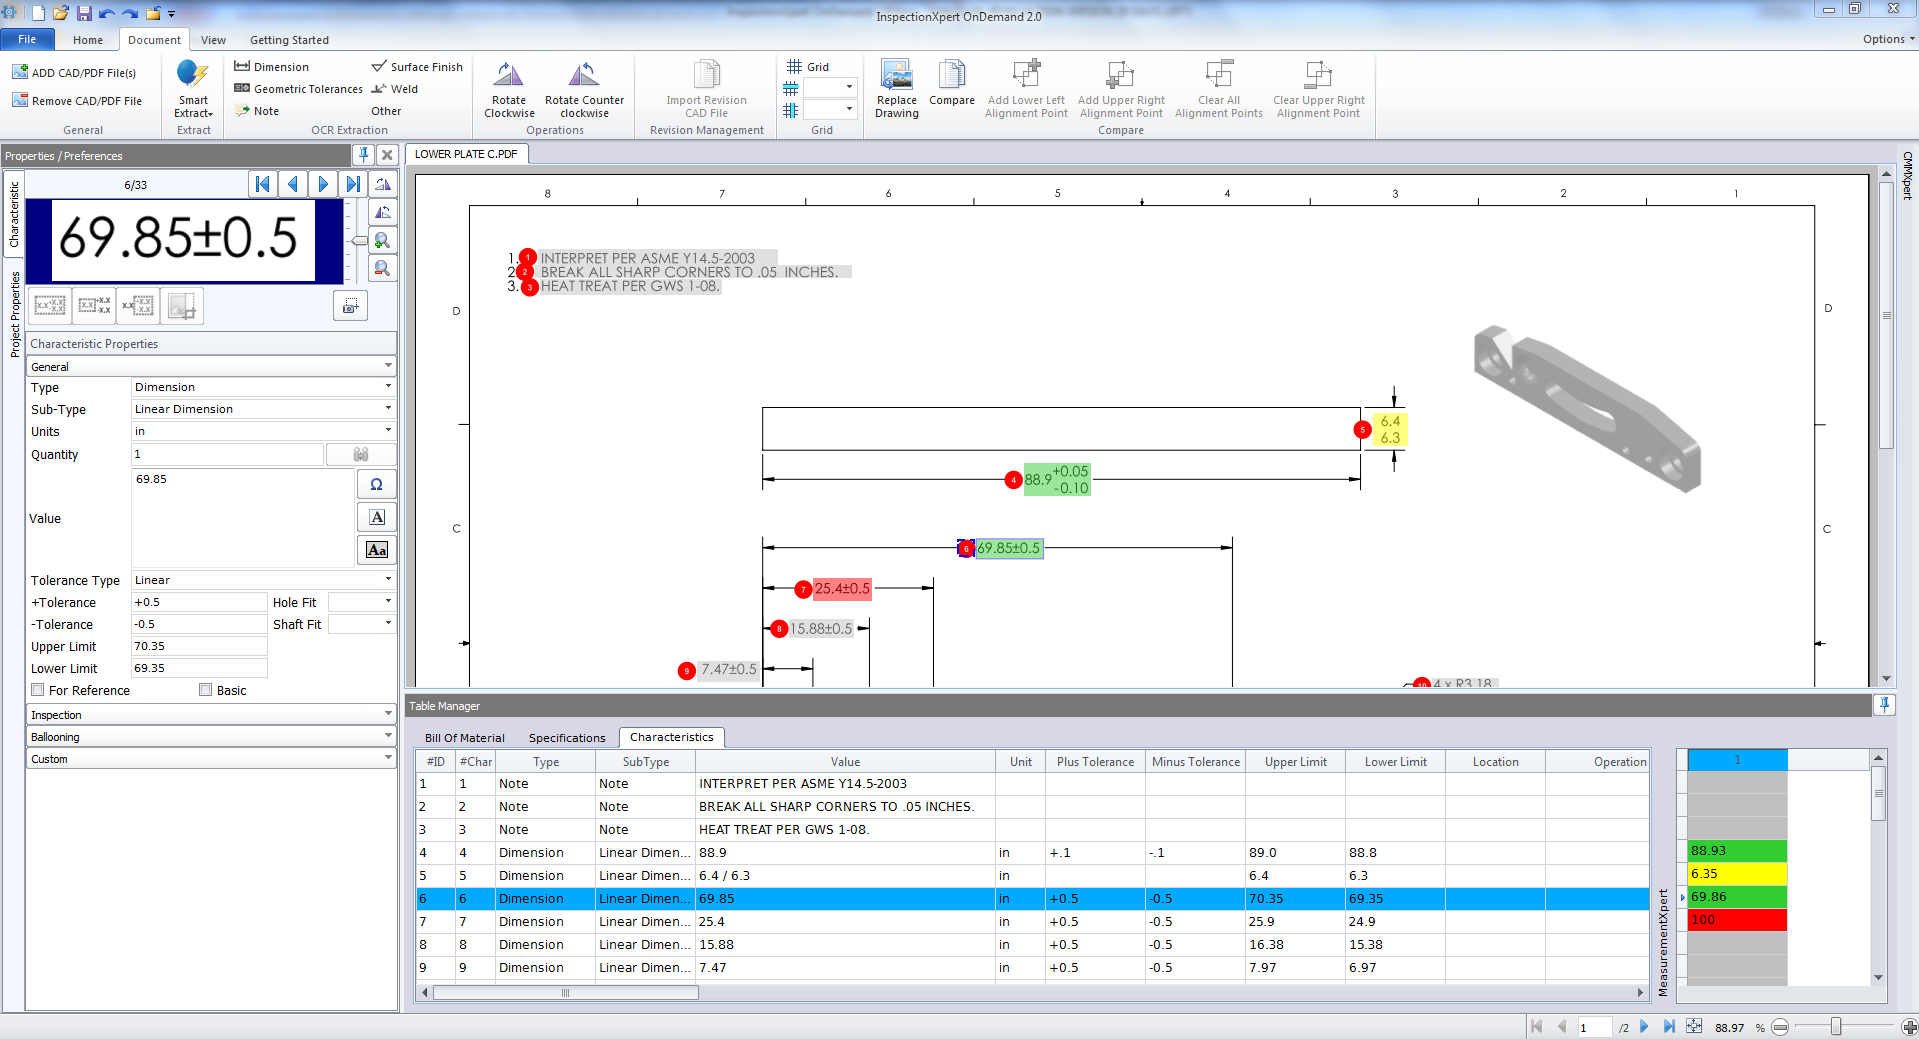
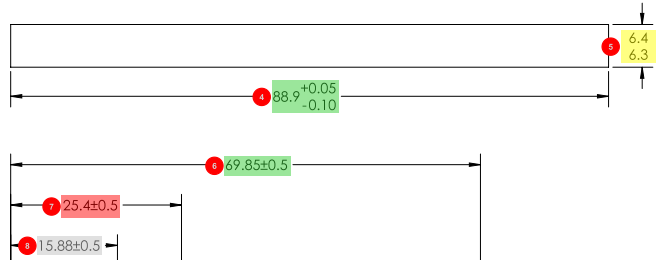
The Measurements Module provides a way to enter your actual measured values into your inspection project. As you enter your measured values, InspectionXpert compares the required value with the active value. The measured values are then highlighted to indicate In Tolerance, Out of Tolerance or Marginally Within Tolerance. InspectionXpert then shades the measurement cell and the dimension in the file green, red or yellow, respectively, based on the status.
To turn on MeasurementXpert (must be purchased separately) and set up MeasurementXpert options, please click on the section links.
Once MeasurementXpert is enabled in an existing InspectionXpert project, the capture regions for each extracted dimension or note will be highlighted in the color that was set for the "Unspecified" option in your MeasurementXpert options. There will also be a new window in the Table Manager on the bottom right of your screen where the actual measured values are entered.

Begin Adding Measurements
1.Click the Bill of Characteristics tab in the Table Manager, and then click in the first row of Column 1 in the Measurements window, enter the measured value for that characteristic, and then press Enter.
2.Continue adding your measured values for each characteristic, which shades the cell and the characteristic on your file with the colors you set for "Pass", "Marginal Pass" and "Failure".
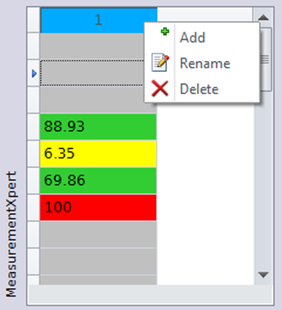
3.After measuring all values for a given part, you can add new columns to enter measurements for multiple parts, right-click in the header and then choose Add to add a new column OR Delete to delete a column of measurements OR click on the Home tab in the MeasurementXpert section and click Add Column or Delete Column.
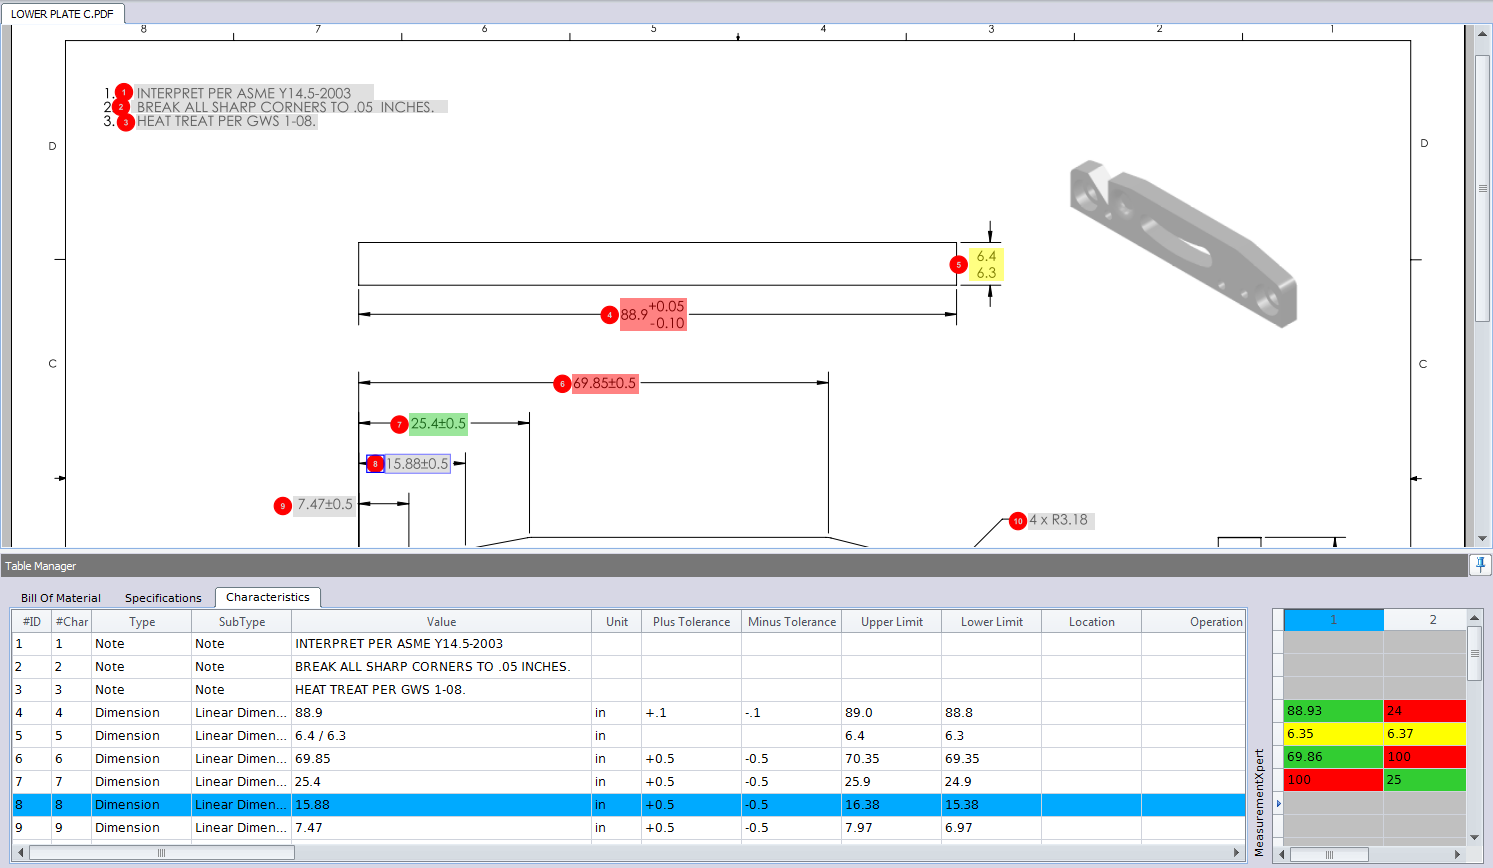
NOTE: When you add a new column, your file will display the highlighted conditions for that column only. So the default display will be "Unspecified" until you begin adding measurements for that column.

When your measurements have been added you can Export to PDF and Excel to create a file that shows your Pass Fail conditions and an Inspection Report that includes your measured values. Click here to learn more about modifying your report templates.
NOTE: You can connect Digital Calipers to your computer (with a cable and keyboard wedge) and enter your measurement data automatically as you measure your part(s).
Image 1 - Shows highlighted values for Pass, Marginal Pass, Failure, and Unspecified.

Image 2 - Right-click to add or delete new columns for new parts being measured

Image 3 - File is highlighted with values for Column 2 (second part being measured)
