Balloon appearance can be modified for only certain balloons in your project, or for all balloons in your project, and ballooning settings can be modified so that all new balloons exhibit the new appearance.
Below are the different ways balloons can be modified:
•Change Individual or Selected Balloons using the Home menu
•See the Changing an Individual Balloon Look/Position to change a balloon using the Characteristic Manager.
•To change the look and position of all of the balloons, use the Options>Project Options>Ballooning section. To save your ballooning settings for future projects, visit the Create or Edit Project Templates section.
Change Individual/Selected Balloons
To change an individual balloon or selected balloons using the Home menu:
.png)
1.Select the balloon(s) you wish to change.
2.Click Home on the menu bar.
3.Click the Text Size ![]() down-arrow and then click a value.
down-arrow and then click a value.
4.Click in the Text Color ![]() down-arrow, click a tab, and then click a color.
down-arrow, click a tab, and then click a color.
5.Click the Balloon Outline ![]() down-arrow, and then click a color, which changes the Outline Color of your balloon.
down-arrow, and then click a color, which changes the Outline Color of your balloon.
6.Click the Balloon Fill ![]() down-arrow, and then click a color, which changes the Fill Color of your balloon.
down-arrow, and then click a color, which changes the Fill Color of your balloon.
7.Click the Fit ![]() down-arrow and then choose a value that represents the number of digits that will fit in the balloon.
down-arrow and then choose a value that represents the number of digits that will fit in the balloon.
8.Click on the Shape down-arrow to change the shape of your balloons.
NOTE: Five balloon shapes are currently supported.
9.Click the Location .png) down-arrow and then click an option surrounding the Characteristic box to select a position and location of the balloon.
down-arrow and then click an option surrounding the Characteristic box to select a position and location of the balloon.
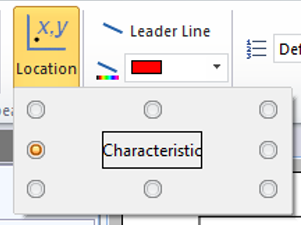
Leader Lines are now supported for both PDF and CAD
To change balloon settings for all new balloons created:
1.Click Home on the menu bar and then click Options, which displays the Options dialog box.
2.Click the Project Options tab and then click Ballooning.
Change Balloon Text Options
1. Click the Starting Value up and down arrows, which specifies the starting number for your balloons.
NOTE: Default is one.
2.Click the Fit down-arrow and then click a value, which specifies the number of digits that will fit in the balloon.
3.Click the Font Size down-arrow and then click a value to change the size of the font and the balloon.
4.Click in the Font Color down-arrow, click a tab, and then click a color to change the color of the font inside the balloon.
5.Check the box Use custom font size and enter the font size to enter a size that is not listed in the drop-down menu.
6.Change the Custom font size units to either pt, in, or mm.
7.Click the Reduce balloon font for grouped characteristics option to reduce the size of the font to fit into balloon size when characteristics are grouped. (See Group and Ungroup Characteristics)
8.Click the Increase balloon fit for grouped characteristics option to increase the fit of the balloon size when characteristics are grouped so that the balloon size increases for grouped characteristics. (See Group and Ungroup Characteristics)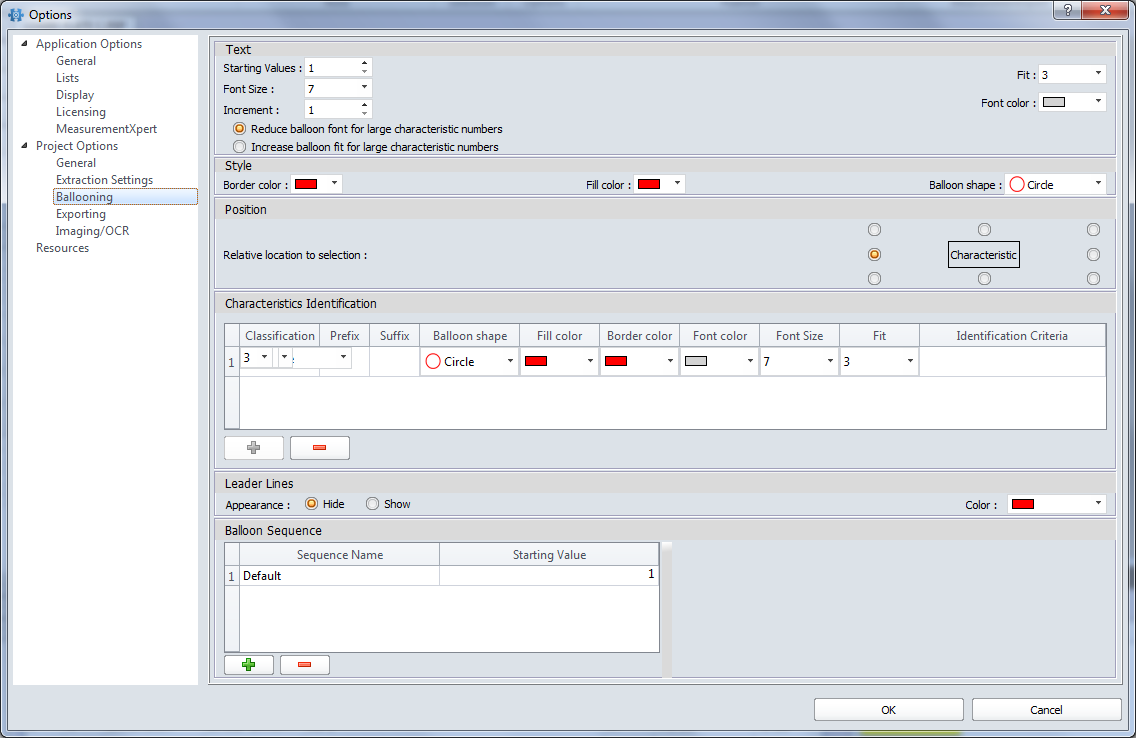
Change Balloon Style and Location Characteristic Options
1.Click the Border Color down-arrow and then select a color to change the outline color of the balloon.
2.Click the Fill Color down-arrow and then select a color to change the fill color of the balloon.
3.Click the Balloon Shape down-arrow and then select the balloon shape. Five balloon shapes are supported.
4.Click the Relative Location to Selection option surrounding the Characteristic to select a default position and location of the balloon. Balloons can be moved manually also (See Select, Move, Lock and/or Delete Balloons section)
Characteristics Identification

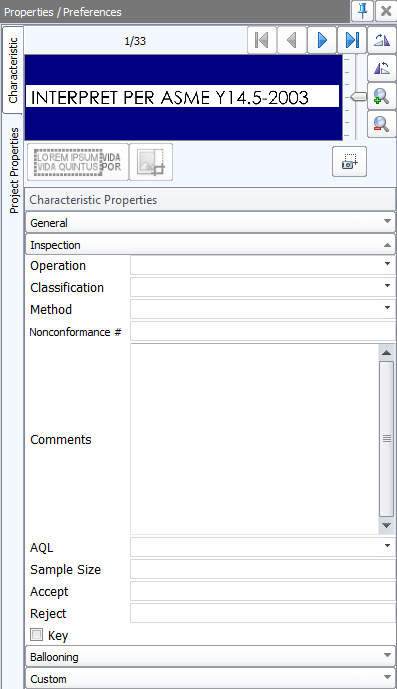
•The characteristics identification options allows for the definition of balloon prefix & suffix values in addition to other balloon appearance properties to be applied based on the Classification value selected for the characteristic or “Identification Criteria.”
•Users can input the wanted "Identification Criteria", and search for that text in the software. If it is found, users can set appearance settings for it. The field can be filled out with a "wildcard value" if the search includes numbers that need to be accounted for. Inserting <l#> will result in accounting for any digit number in the identification.
•Selected balloon appearance options will apply automatically upon extraction when “Identification Criteria” is found within an annotation’s text.
•If “Identification Criteria” has not been defined, you can apply selected balloon appearance options by manually assigning a classification value Characteristic Property Manager or Table Manager.
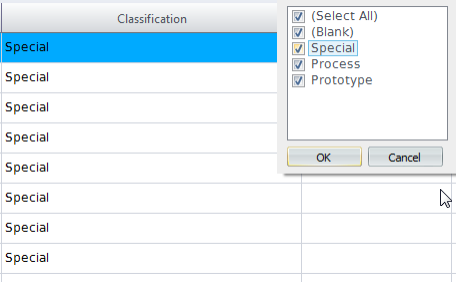
•You can filter the Characteristics table on the content of Classification column, like with other columns.
Balloon Sequencing
NOTE: Balloon Sequencing, Balloon Increment, and Customizable balloon numbering can only be used independently of one another in a project.
•Balloon Sequences are accessible through the Home ribbon within the Balloon Appearance Section, under "Ballooning" on the Characteristic Property Manager, and under Project Options > Ballooning
•Sequences can be created using the + button in Project Options > Ballooning > Balloon Sequence section. These sequences can be named and can have a starting value specified

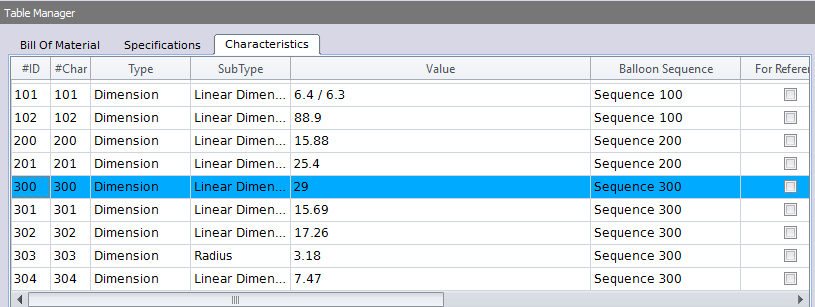
•After ballooning a characteristic, the balloons sequence can be set via the table manager under "Balloon Sequencing", or in the ballooning section of the Characteristic Property Manager. It can also be seen on the Home ribbon in the Balloon Appearance section

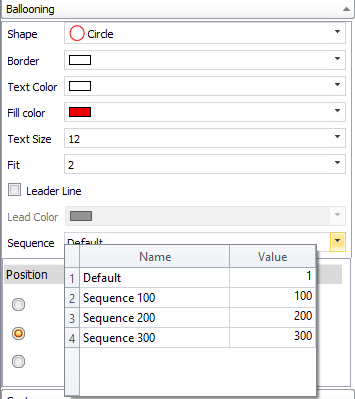

•When a balloon is placed in a sequence, the Char # of that balloon is set to a starting value of that sequence. For each balloon placed in that sequence, the Char # is increased
Balloon Number Increment
NOTE: Balloon Sequencing, Balloon Increment, and Customizable balloon numbering can only be used independently of one another in a project.
![]()
•The increment value changes the numbers between one balloon and the next. Ex. (2 = 1, 3, 5) (4 = 1, 5, 9)
•The "Balloon Increment" Project Option is located under "Options">"Project Options">"Ballooning">"Text"