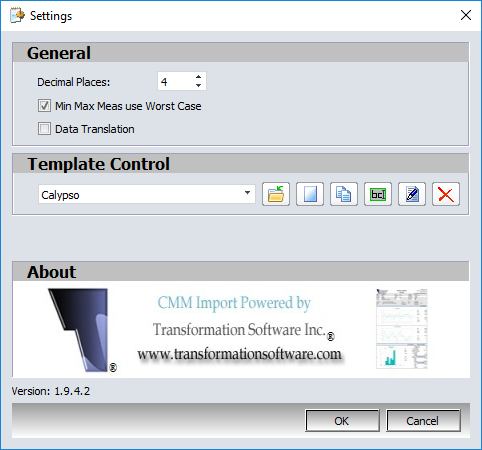
After the CMMXpert module is enabled, you can use the Settings option to create the import file settings and decimal point values. The Template Control section of the CMM Grid Settings dialog box also allows you to add new templates, copy templates, rename templates, edit templates, and delete templates. Once the CMMXpert settings and template are created, edited, and selected, the CMM file can be imported.
To change the settings option:
1.Click the ![]() settings button in the CMMXpert window, which opens the CMM Grid Settings dialog box.
settings button in the CMMXpert window, which opens the CMM Grid Settings dialog box.
2.Optional: Click in the Decimal Places text box OR click the up/down arrow to change the number of decimal places that the values will import with the number of places specified.
3.Optional: Click the Min Max Meas use Worst Case checkbox to set the type of values that show.
4.Click the Template Control down-arrow and then select a template type.
5.Click the OK button to save the settings and close the dialog box.

1.Click the ![]() settings button in the CMMXpert window, which opens the CMM Grid Settings dialog box.
settings button in the CMMXpert window, which opens the CMM Grid Settings dialog box.
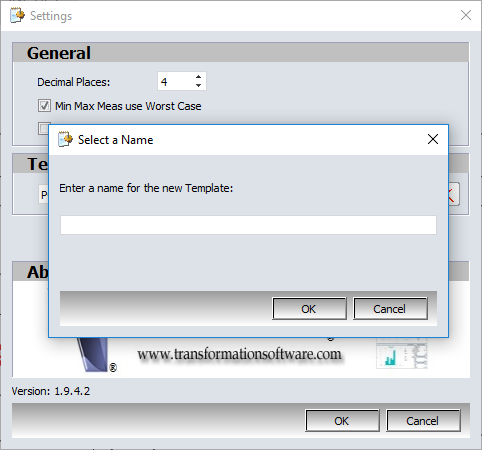
2.Click the ![]() add template button in the CMM Grid Settings dialog box, which displays the Select a Name for the template dialog box.
add template button in the CMM Grid Settings dialog box, which displays the Select a Name for the template dialog box.
3.Type a name in the text box and then click OK, which creates the blank template.
4.Edit the template to setup the template for import.
5.Click OK to close the settings dialog box.

Edit a new or existing template:
Templates can be edited using General, Axes, Balloon Markers, Columns, Columns 2, Features, GDT & Bonus, Meas. Start, Misc., Replace Table, Report Info, Text Markers, and CMM Specific tabs for both PC DMIS and Calypso that control how CMMXpert reads and interprets the CMM output files.
1.Click the Template Control down-arrow and then click the template name that you wish to edit.
2.Click the ![]() edit template button, which opens the CMM Template Editor dialog box for the selected template.
edit template button, which opens the CMM Template Editor dialog box for the selected template.
3.Click on the options in the left panel, which displays the related sections in the right panel and then enter the information for the template, which are described in the General, Axes, Balloon Markers, Columns, Columns 2, Features, GDT & Bonus, Meas. Start, Misc., Replace Table, Report Info, Text Markers sections or for CMM specific tabs in the PC DMIS and Calypso sections.
4.Click OK when all the values are setup for the template.
5.Click OK to close the settings dialog box.
1.Click the Template Control down-arrow and then click the template name that you wish to copy.
2.Click the ![]() copy template button, which creates the template name with the name copy in the selection.
copy template button, which creates the template name with the name copy in the selection.
3.The copied template can be edited, renamed, copied, or imported.
4.Click OK to close the settings dialog box.
1.Click the Template Control down-arrow and then click the template name that you wish to rename.
2.Click the ![]() rename template button, which opens the Select a Name dialog box.
rename template button, which opens the Select a Name dialog box.
3.Type a name and then click the OK button to rename the template.
4.Click OK to close the settings dialog box.
1.Click the Template Control down-arrow and then click the template name that you wish to delete.
2.Click the ![]() delete template button, which removes the template.
delete template button, which removes the template.
3.Click OK to close the settings dialog box.